Set up the Python project with GIT and virtual environment
Ok, after you are done with all items in the prerequisites we are ready to get started with our first project.
You have to get empty python project to start working with ML and RL in the end after reading this page. After you set up your project in the Pycharm terminal you should see all these 4 items which basically are signs that you set up everything correctly and are ready to start. Items 1, 2, 3 shows that your virtual environment set up correctly. Item 2 shows that your virtual environment is inherited from your base version of Python. It can be any python version. And 4 number shows that your project is connected to your github account and all your files added to the git from now are under git track.


Create new project and/or get from git
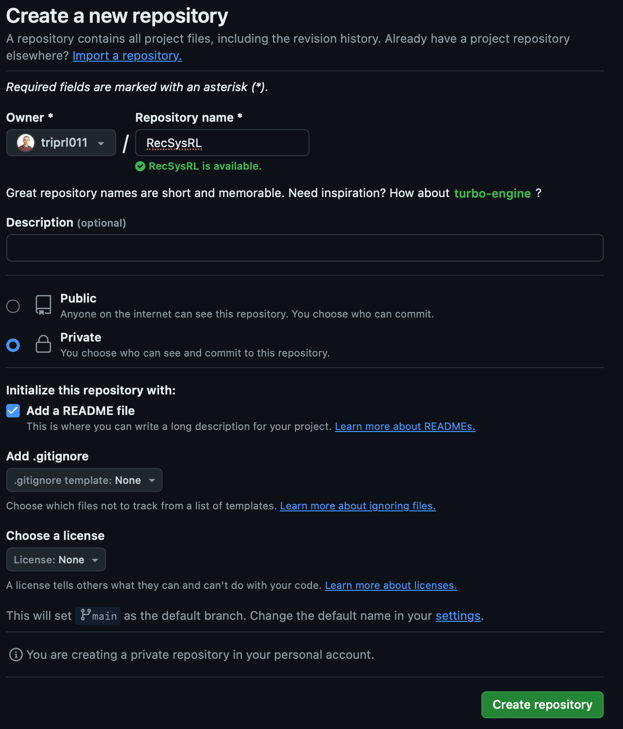
You have two options: 1) create your own new project from scratch. If you want your project connected to the github already, you can create new project in the github firstly and then go to the step two. Choose repository name, private or public type, create readme file gitignore is optionally, later you can set up it manually as well, and click create repository.

then copy http address .
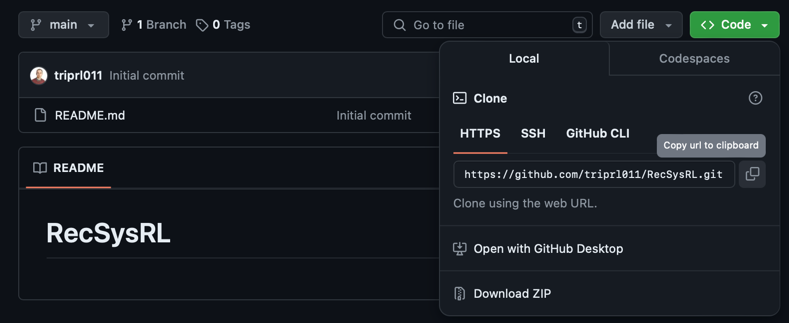

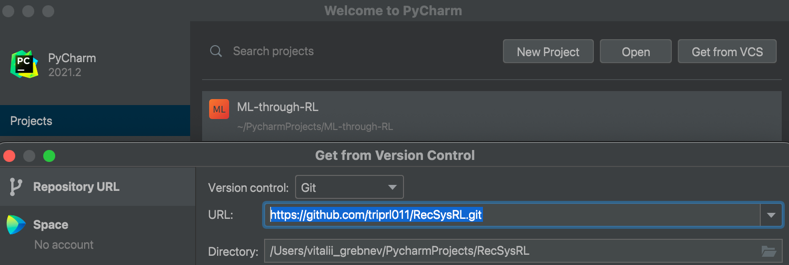
and go the pycharm crate new project, Click get from VCS and pass url and click clone. Choose your
github account where you created repository, if you have a few accounts.


Now we can see that we don't have 1 and 3 items. We will set up this in the next part of this chapter.
Also i have to mention that you can start new project without github and only after connect it to your github project using git init, git add commands, passwords and credentials authorisations.
Set up virtual environment
Ok, let's set up venv. There're two options: use git to create and activate venv and use Pycharm User Interface (UI). I personally prefer to use UI.
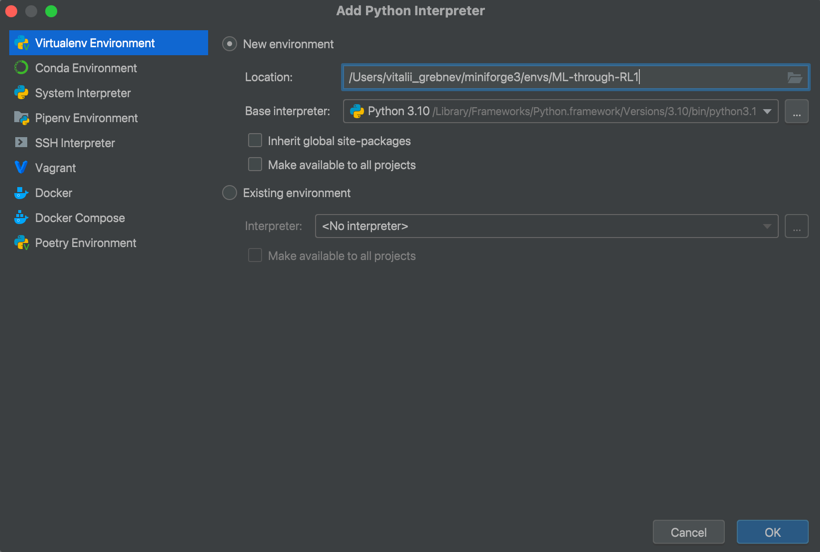
So do right click to the python with item Number 3 on the first picture, click add interpreter.
After specify unique name consequent with your project name, specify path to your project and click OK.


Now we can see all 1,2,3,4 items as we wanted.
After you created venv, don't forget to open new terminal, just click sign plus (+) new Local (2) on the picture
above. If you see all 4 items then project we correctly set up venv and ready to start working.
GIT,- must have materials
Here we discuss some basic info about git, which is more or less enough to start working with a few people on your project. git makes that purpose and consequence your life much easier.
Create new branch from the main or master.
It can be development branch or branch with name of your feature or task.
If you work alone, you can create new branch right now, but if you work in a team
Before doing new branch don't forget to pull new last changes of your teammates from git and you have
the last version of the project. It is better to do it. Also I need to mention that it will not a problem
if you work on independents features and files, but it's a good practice as well.
Pycharm helps you and gives info weather you need do pull or not.
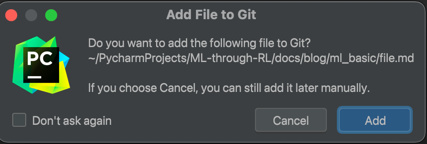
When you create new file Pycharm suggests you add this file to the track. If you need to track this file then yes. This file will be green, as new added file.

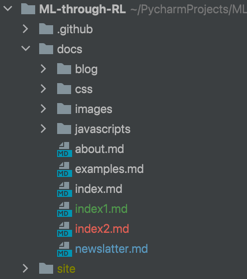
Pycharm help to track different changes in your project using colors. There are a few colors which are used for this purpose.
- green - file is new, have never been committed yet;
- red - file was created, but GIT doesn't see it, and when you push your commit, this file will not be pushed. You can add this file to GIT if you need it;
- blue - when you push this file before, this file is under git track and you made some changes in this file after your last commit;
- white - file is under track, but no changes after last commit;
- yellow - files are in the gitignore. This files will not be pushed to the git and you keep them locally on your machine.

OK, you prepared some changes, you want to push it to the git to keep this changes. You made nice changes and to save them do the commit. It better to make commits and pushes consequently. What I mean by that. You should do commits more or less regularly. There's good practice having one commit and push for one feature and change in the project. It is good in case if something goes wrong you can roll back this changes. If you have changes for more then one feature to do it easily will be a bit more difficult. So git is useful to get old versions of your code if it is in need and also exchange this code between all member of your team who are working on this project in parallel, so very convenient.
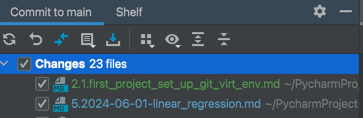
To make a commit, you can click command+K, Check them that you want to commit all this
files, go through all of them one by one, check changes, write short descriptive with clean meaning comments for this commit
and click commit/and or push

After you made all your commits and ready to push your code to git, click command+shift+K, Check them that you want to commit all this
files, go through all of them one by one, check changes, write short descriptive with clean meaning comments for this commit
and click commit/and or push.
Before push you can see green circle that you have some commits and you have commits ready to push. If you see near blue circle it means there are some changes maid by someone in your project and before push it's better to pull this changes. Also, there's a chance that some and someone else changes will be conflicting. You will be asked to resolve them. Resolve them together with your team.


Before push check all materials one time more and click push. Ok, now we know
A bit more useful info about git.
When we write command git init or when download our repository from github we actually have folder
.git inside this project. If everything set up correctly it means this project is under git track.
if you want stop it, you can use some commands to do it or delete this folder and init it again and/or
connect it to another repository in github if you need it.
After you are done with commit and with feature you can merge your branch with feature to the development and/or main/master branches.
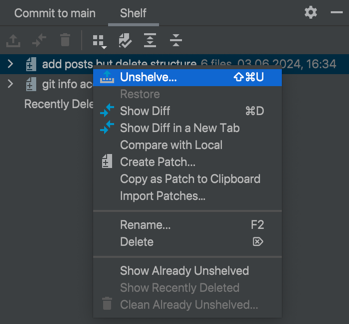
Sometimes, you made some changes, but you need to write another code for instance in another branch, but code isn't ready to push or commit, you can Shelf it. You can do it and them when you are done with another tasks, you can unshelf it later and continue work.
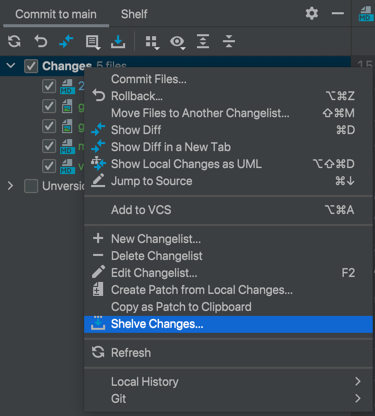

Unshelf changes.

That it! It is more or less basic info about git which is required on the first steps of work